À propos de votre README de profil
Vous pouvez partager des informations personnelles avec la communauté sur GitHub en créant un profil LISEZMOI. GitHub affiche votre README de profil en haut de votre page de profil.
C’est vous qui décidez des informations à inclure dans votre README de profil ; vous disposez ainsi d’un contrôle total sur la façon dont vous vous présentez sur GitHub. Voici quelques exemples d’informations que les visiteurs peuvent trouver intéressantes, amusantes ou utiles dans votre README de profil.
- Une section « À propos de moi » qui décrit votre travail et vos intérêts
- Les contributions dont vous êtes fier et le contexte de ces contributions
- Des conseils pour obtenir de l’aide dans les communautés où vous êtes impliqué

Vous pouvez mettre en forme le texte et inclure des emojis, des images et des fichiers GIF dans votre README de profil à l’aide de GitHub Flavored Markdown. Pour plus d’informations, consultez « Prise en main de la rédaction et de la mise en forme sur GitHub ». Pour obtenir un guide pratique sur la personnalisation de votre fichier README de profil, consultez « Démarrage rapide pour l'écriture sur GitHub ».
Prérequis
GitHub affiche votre README de profil sur votre page de profil si toutes les conditions suivantes sont remplies.
- Vous avez créé un dépôt avec un nom qui correspond à votre nom d’utilisateur GitHub
- Le dépôt est public
- Le dépôt contient un fichier nommé README.md à sa racine
- Le fichier README.md a tout contenu
Remarque
Si vous avez créé un référentiel public portant le même nom que votre nom d’utilisateur avant juillet 2020, GitHub n’affichera pas automatiquement le fichier LISEZMOI du référentiel sur votre profil. Vous pouvez partager manuellement le fichier README du référentiel avec votre profil en accédant au référentiel sur GitHub et en cliquant sur Partager avec le profil.
Ajout d’un README de profil
-
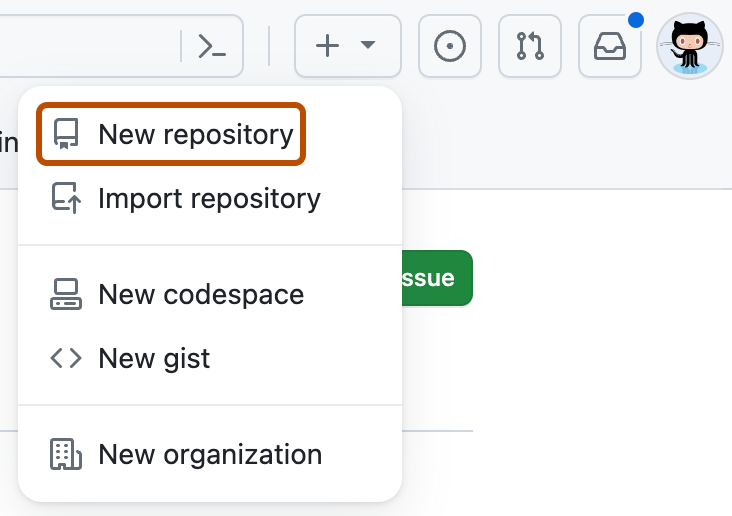
Dans le coin supérieur droit de n’importe quelle page, sélectionnez sur , puis cliquez sur Nouveau référentiel.
-
Sous « Nom du dépôt », tapez un nom de dépôt qui correspond à votre nom d’utilisateur GitHub. Par exemple, si votre nom d’utilisateur est « octocat », le nom du dépôt doit être « octocat ».
-
Dans le champ « Description », vous pouvez taper la description de votre référentiel. Par exemple, « Mon dépôt personnel ».
-
Sélectionnez Public.
-
Sélectionnez Initialize this repository with a README (Initialiser ce dépôt à l’aide d’un fichier LISEZMOI).
-
Cliquez sur Créer le dépôt.
-
Au-dessus de la barre latérale droite, cliquez sur Modifier le README.

Le fichier README généré est prérempli avec un modèle afin de vous donner une inspiration pour votre README de profil.
Pour obtenir une synthèse de tous les emojis disponibles et de leurs codes, consultez « Aide-mémoire Emoji ».
Suppression d’un README de profil
Le fichier LISEZMOI du profil sera supprimé de votre profil GitHub si l'une des conditions suivantes est remplie :
- Le fichier LISEZMOI est supprimé ou vidé.
- Le référentiel est privé.
- Le nom du référentiel ne correspond plus à votre nom d'utilisateur en raison d'un changement dans l'un ou l'autre nom ou dans les deux.
La méthode que vous choisissez dépend de vos besoins, mais si vous n’êtes pas sûr, nous vous recommandons de rendre votre dépôt privé. Pour savoir comment rendre votre référentiel privé, consultez « Définition de la visibilité du dépôt ».