注意
将自有 API 密钥用于 GitHub Copilot 的功能处于 公开预览 阶段,可能会有所变动。
你可以将自己的 API 密钥引入到 GitHub Copilot 中,并使团队能够将首选的大型语言模型 (LLM) 提供程序与 副驾驶聊天、 Copilot 命令行界面(CLI)和 VS Code 结合使用。
支持来自以下提供程序的 API 密钥:
- Anthropic
- AWS Bedrock
- Google AI Studio
- Microsoft Foundry
- OpenAI
- OpenAI 兼容的提供程序
- xAI
还支持微调模型,但根据微调设置的不同,结果的功能和质量可能会有所不同。 在生产环境中使用模型之前,应仔细测试模型并仔细查看其输出。 使用自己的 API 密钥不需要 Copilot 订阅。 但是,如果没有订阅,则无法访问其他 Copilot 功能,例如移动访问、自动化和远程服务器功能。
为什么使用自己的 API 密钥?
作为企业所有者,你可能对治理、数据安全性和合规性有特定要求。 设置自己的 API 密钥可以解决:
- 治理和合规性: 选择符合组织策略和法规要求的 LLM 提供商。
- 成本管理: 与现有的付款方式、合同、信用额度或协商费率保持一致,避免使用超额。
- 可见性和控制: 管理团队可以使用的模型,还可以通过提供商的现有仪表板和计费来监视用量。
- 灵活性: 支持组织已使用的自定义或专用模型。
- 气隙环境: 在隔离网络中使用 Copilot,无需依赖 GitHub 在 VS Code 或 Copilot 命令行界面(CLI) 中的 REST API。
将密钥添加到企业帐户
重要
强烈建议仅向 API 密钥分配必要的最小范围,以遵守最低特权原则。
添加密钥并选择一个或多个模型后,你和你所在组织的成员都将能够通过 副驾驶聊天、 Copilot 命令行界面(CLI)和 VS Code 使用这些模型。 您的模型将显示在模型选取器底部,在企业名称下方。
注意
要使贵组织的成员能够在 Visual Studio Code 中使用第三方模型,必须启用 VS Code 中的“自带语言模型密钥” 策略。 有关详细信息,请参阅Copilot中的GitHub.com“设置”页。
-
导航到您的企业。 例如,从 GitHub.com 上的 公司 页面。
-
在页面顶部,单击 AI 控件。
-
在边栏中,单击 Copilot。
-
单击“ 配置允许的模型”。
-
单击“ 自定义模型 ”选项卡。
-
在 API 密钥列表上方,单击“ 添加 API 密钥”。
-
在“提供程序”下,选择要使用的 LLM 提供程序。
-
在“名称”下,键入此密钥的名称。 这将显示在模型选取器中。
-
在“API 密钥”下,键入或粘贴密钥。
-
根据所使用的提供程序,选择或添加模型。
-
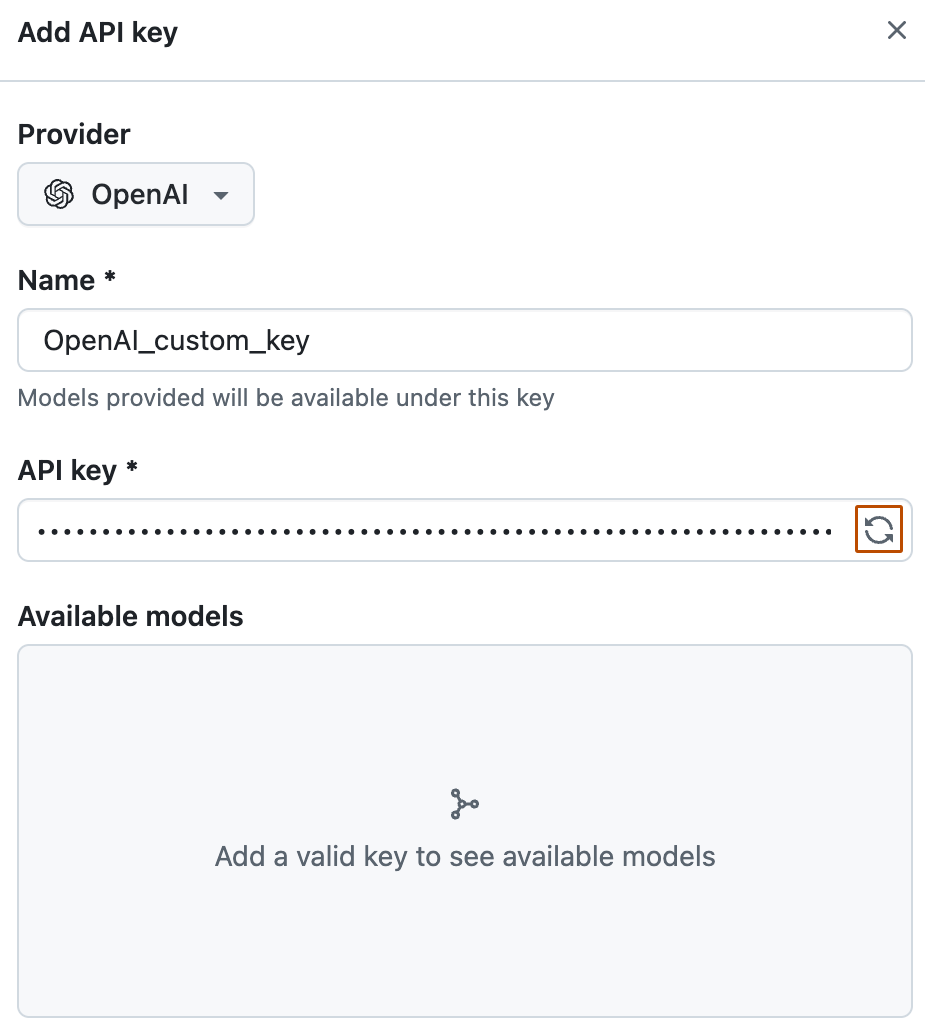
如果使用 OpenAI、Anthropic 或 xAI,请单击 API 密钥文本字段中的 以提取与密钥关联的模型。 接下来,在“可用模型”下,选择要使用的模型。
-
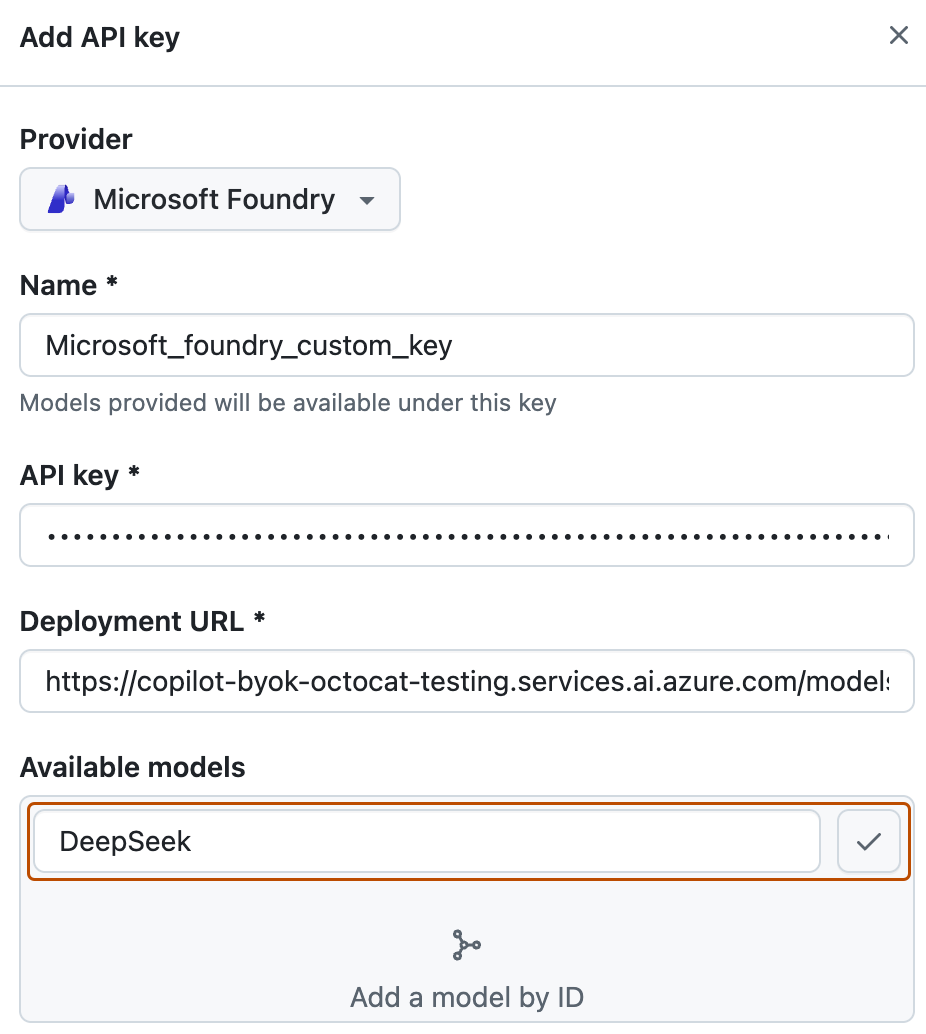
如果使用 Microsoft Foundry,请在“部署 URL”下的字段中键入部署 URL。 接下来,在“可用模型”下的字段中,键入模型 ID,然后单击 添加它。
如果模型具有不同的部署 URL,则无法将其添加到同一 API 密钥。 为每个部署 URL 创建单独的 API 密钥。
-
-
选择或添加要提供的模型后,单击“ 保存”。


管理组织中自定义模型的可用性
可以选择已添加的模型是否可用于企业帐户中的组织。
- 导航到您的企业。 例如,从 GitHub.com 上的 公司 页面。
- 在页面顶部,单击 AI 控件。
- 在边栏中,单击 Copilot。
- 单击“ 配置允许的模型”。
- 单击“ 自定义模型 ”选项卡。
- 在 API 密钥列表上方,单击“ 添加的模型 ”选项卡。
- 在模型旁边,单击“ 配置”。 如果任何组织已获得访问模型的权限,则需要点击所有组织 或 X 组织,而不是“配置”。
- 在打开的模式中,单击Access选项卡。
注意
在“Access”选项卡可用之前,必须将模型设置为“已启用”。
- 选择应如何向组织提供模型:
- 若要使模型可供企业帐户中的所有组织使用,请选择 “允许所有组织”。
- 若要使模型仅适用于特定组织,请选择“ 选择每个组织”,然后选中或取消选中下面列出的组织。
- 单击“ 保存”。