この記事では、GitHub Web インターフェイスを使用したキャッシュの管理について説明しますが、以下によりキャッシュを管理することもできます。
- REST API を使う。 「GitHub Actions キャッシュの REST API エンドポイント」を参照してください。
- コマンド ラインから
gh cacheサブコマンドを使用します。 GitHub CLI のドキュメントを参照してください。
キャッシュ エントリの表示
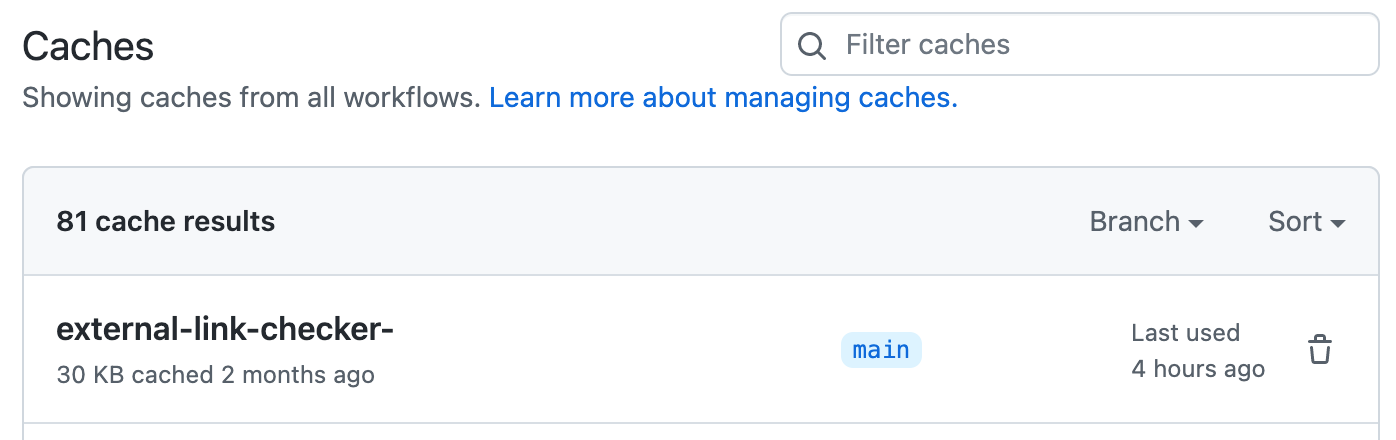
Web インターフェイスを使って、リポジトリのキャッシュ エントリの一覧を表示できます。 キャッシュの一覧では、各キャッシュで使用されているディスク領域の量、キャッシュが作成された日時、キャッシュが最後に使用された日時を確認できます。
-
GitHub で、リポジトリのメイン ページに移動します。
-
リポジトリ名の下にある [ Actions] をクリックします。
!["github/docs" リポジトリのタブのスクリーンショット。 [アクション] タブがオレンジ色の枠線で強調表示されています。](/assets/cb-12958/images/help/repository/actions-tab-global-nav-update.png)
-
左側のサイドバーの [Management] セクションで、[ Caches] をクリックします。
-
リポジトリのキャッシュ エントリの一覧を確認します。
- 特定のブランチ用に使用されるキャッシュ エントリを検索するには、 [Branch] ドロップダウン メニューをクリックして、ブランチを選択します。 キャッシュの一覧に、選択したブランチ用に使用されるすべてのキャッシュが表示されます。
- 特定のキャッシュ キーを持つキャッシュ エントリを検索するには、
key: key-nameフィールドで構文 **** を使用します。 キャッシュの一覧に、そのキーが使用されたすべてのブランチのキャッシュが表示されます。
!["github/docs" リポジトリのタブのスクリーンショット。 [アクション] タブがオレンジ色の枠線で強調表示されています。](/assets/cb-12958/mw-1440/images/help/repository/actions-tab-global-nav-update.webp)

キャッシュ エントリの削除
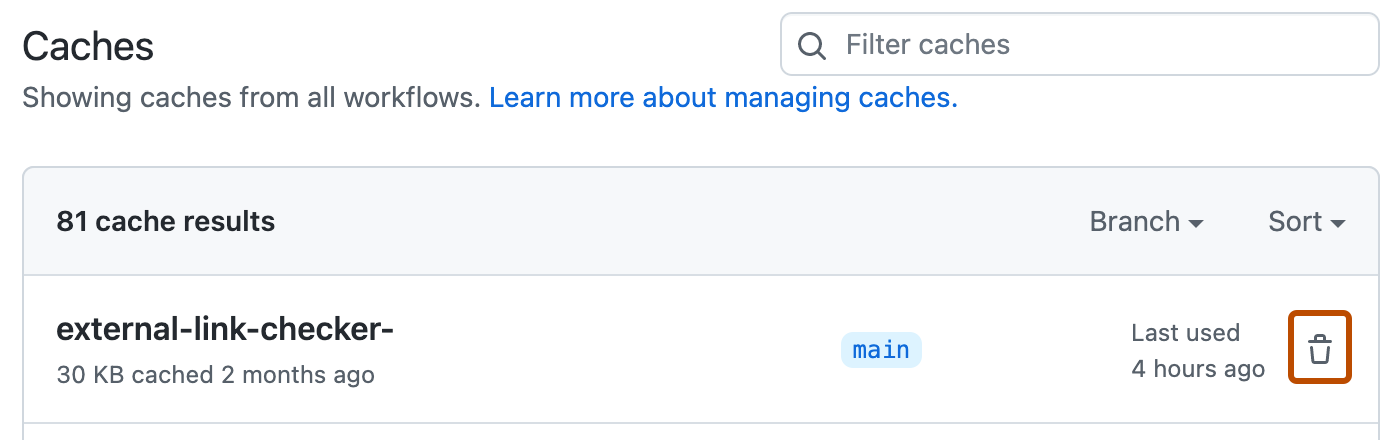
リポジトリへの write アクセス権を持つユーザーは、GitHub Web インターフェイスを使ってキャッシュ エントリを削除できます。
-
GitHub で、リポジトリのメイン ページに移動します。
-
リポジトリ名の下にある [ Actions] をクリックします。
-
左側のサイドバーの [Management] セクションで、[ Caches] をクリックします。
-
削除するキャッシュ エントリの右側にある をクリックします。

キャッシュ エントリの強制削除
キャッシュにはブランチ スコープの制限が設定されています。つまり、一部のキャッシュは使用オプションが制限されます。 キャッシュ スコープの制限について詳しくは、「依存関係キャッシュのリファレンス」をご覧ください。 特定のブランチに限定されたキャッシュで大量のストレージ クォータが使用されている場合は、default ブランチからのキャッシュが頻繁に作成および削除される可能性があります。
たとえば、リポジトリでは新しい pull request が多数オープンされ、それぞれがそのブランチに制限された独自のキャッシュがある場合があります。 これらのキャッシュは、そのリポジトリのキャッシュ ストレージの大部分を占める可能性があります。 リポジトリが最大キャッシュ ストレージに達すると、キャッシュの削除ポリシーにより、最終アクセス日時が最も古いものから最も新しいものの順にキャッシュが削除されて、スペースが作成されます。 このような場合にキャッシュのスラッシングを防ぐため、キャッシュの削除ポリシーよりも速い周期でキャッシュを削除するようにワークフローを設定できます。 GitHub CLI を使って、特定のブランチのキャッシュを削除できます。
次のワークフローの例では、gh cache を使用して、pull request が閉じられた後にブランチによって作成された最大 100 個のキャッシュを削除します。
リポジトリ間の pull request またはフォークからの pull request で次の例を実行するには、pull_request_target イベントを使用してワークフローをトリガーできます。 ワークフローのトリガーに pull_request_target を使用する場合は、セキュリティに関する考慮事項に留意する必要があります。 詳しくは、「ワークフローをトリガーするイベント」をご覧ください。
name: Cleanup github runner caches on closed pull requests
on:
  pull_request:
    types:
      - closed

jobs:
  cleanup:
    runs-on: ubuntu-latest
    permissions:
      actions: write
    steps:
      - name: Cleanup
        run: |
          echo "Fetching list of cache keys"
          cacheKeysForPR=$(gh cache list --ref $BRANCH --limit 100 --json id --jq '.[].id')

          ## Setting this to not fail the workflow while deleting cache keys.
          set +e
          echo "Deleting caches..."
          for cacheKey in $cacheKeysForPR
          do
              gh cache delete $cacheKey
          done
          echo "Done"
        env:
          GH_TOKEN: ${{ github.token }}
          GH_REPO: ${{ github.repository }}
          BRANCH: refs/pull/${{ github.event.pull_request.number }}/merge
または、API を使用して、独自の周期ですべてのキャッシュを自動で一覧表示または削除することもできます。 詳しくは、「GitHub Actions キャッシュの REST API エンドポイント」をご覧ください。