Einführung
GitHub Actions ist eine Plattform für Continuous Integration und Continuous Delivery (CI/CD), mit der du deine Build-, Test- und Bereitstellungspipeline automatisieren kannst. Sie können Workflows erstellen, mit denen Sie Tests ausführen können, wenn Sie eine Änderung am Repository durchführen, oder mit denen Sie gemergte Pull Requests für die Produktion bereitstellen können.
In diesem Schnellstarthandbuch erfahren Sie, wie Sie die Benutzeroberfläche von GitHub verwenden, um einen Workflow hinzuzufügen, der einige der wesentlichen Features von GitHub Actions veranschaulicht.
Für die ersten Schritte mit vorkonfigurierten Workflows durchsuchen Sie die Liste der Vorlagen im Repository der Aktions-/Starter-Workflows. Weitere Informationen finden Sie unter Verwenden von Workflowvorlagen.
Eine Übersicht über die GitHub Actions-Workflows findest du unter Workflows. Weitere Informationen zu den verschiedenen Komponenten von GitHub Actions findest du unter Grundlegendes zu GitHub Actions.
Verwenden von Workflowvorlagen
GitHub bietet vordefinierte Workflowvorlagen, die du unverändert übernehmen oder anpassen kannst, um einen eigenen Workflow zu erstellen. GitHub analysiert den Code und zeigt Workflowvorlagen an, die für dein Repository nützlich sein könnten. Wenn Dein Repository beispielsweise Node.js-Code enthält, werden Vorschläge für Node.js-Projekte angezeigt.
Diese Workflowvorlagen ermöglichen einen schnellen Einstieg und bieten verschiedene Konfigurationen, wie z. B.:
- CI: Workflows für Continuous Integration
- Bereitstellungen: Bereitstellungsworkflows
- Automatisierung: Workflows zur Automatisierung
- Codeüberprüfung: Workflows zur Codeüberprüfung
- Seiten: Seitenworkflows
Sie können diese Workflows als Ausgangspunkt nutzen, um eigene benutzerdefinierte Workflows zu erstellen, oder sie unverändert übernehmen. Die vollständige Liste der Workflowvorlagen können Sie im Repository der Aktions-/Starter-Workflows durchsuchen.
Voraussetzungen
In diesem Leitfaden wird davon ausgegangen, dass:
-
Sie verfügen mindestens über Grundkenntnisse in der Verwendung von GitHub. Andernfalls finden Sie es hilfreich, einige der Artikel in der Dokumentation für Repositorys und Pull Requests zuerst zu lesen. Beispiele findest du unter Schnellstart für Repositorys, Informationen zu Branches und Informationen zu Pull Requests.
-
Sie verfügen über ein Repository für GitHub, in dem Sie Dateien hinzufügen können.
-
Sie haben Zugriff auf GitHub Actions.
Hinweis
Wenn unter dem Namen des Repositorys auf GitHub nicht die Registerkarte Actions angezeigt wird, sind Actions für das Repository möglicherweise deaktiviert. Weitere Informationen finden Sie unter Einstellung der GitHub Actions für ein Repository verwalten.
Erstellen deines ersten Workflows
-
Erstellen Sie in Ihrem Repository unter GitHub im Verzeichnis
github-actions-demo.ymleine Workflow-Datei namens.github/workflows. Gehen Sie hierzu folgendermaßen vor:-
Wenn das
.github/workflows-Verzeichnis bereits vorhanden ist, navigieren Sie zu diesem Verzeichnis unter GitHub, klicken Sie auf Datei hinzufügen, klicken Sie dann auf Neue Datei erstellen und nennen Sie die Dateigithub-actions-demo.yml. -
Wenn Ihr Repository nicht über ein
.github/workflows-Verzeichnis verfügt, wechseln Sie zur Standardseite des Repositorys auf GitHub, klicken Sie auf Datei hinzufügen, klicken Sie dann auf Neue Datei erstellen und nennen Sie die Datei.github/workflows/github-actions-demo.yml. Dadurch werden die Verzeichnisse.githubundworkflowsund die Dateigithub-actions-demo.ymlin einem einzigen Schritt erstellt.
Hinweis
Damit GitHub alle GitHub Actions-Workflows in Ihrem Repository ermitteln können, müssen Sie die Workflow-Dateien in einem Verzeichni namens
.github/workflowsspeichern.Sie können der Workflow-Datei einen beliebigen Namen geben, aber Sie müssen als Suffix
.ymloder.yamlverwenden. YAML ist eine Markupsprache, die häufig für Konfigurationsdateien verwendet wird. -
-
Kopiere die folgenden YAML-Inhalte in die Datei
github-actions-demo.yml:YAML name: GitHub Actions Demo run-name: ${{ github.actor }} is testing out GitHub Actions 🚀 on: [push] jobs: Explore-GitHub-Actions: runs-on: ubuntu-latest steps: - run: echo "🎉 The job was automatically triggered by a ${{ github.event_name }} event." - run: echo "🐧 This job is now running on a ${{ runner.os }} server hosted by GitHub!" - run: echo "🔎 The name of your branch is ${{ github.ref }} and your repository is ${{ github.repository }}." - name: Check out repository code uses: actions/checkout@v6 - run: echo "💡 The ${{ github.repository }} repository has been cloned to the runner." - run: echo "🖥️ The workflow is now ready to test your code on the runner." - name: List files in the repository run: | ls ${{ github.workspace }} - run: echo "🍏 This job's status is ${{ job.status }}."name: GitHub Actions Demo run-name: ${{ github.actor }} is testing out GitHub Actions 🚀 on: [push] jobs: Explore-GitHub-Actions: runs-on: ubuntu-latest steps: - run: echo "🎉 The job was automatically triggered by a ${{ github.event_name }} event." - run: echo "🐧 This job is now running on a ${{ runner.os }} server hosted by GitHub!" - run: echo "🔎 The name of your branch is ${{ github.ref }} and your repository is ${{ github.repository }}." - name: Check out repository code uses: actions/checkout@v6 - run: echo "💡 The ${{ github.repository }} repository has been cloned to the runner." - run: echo "🖥️ The workflow is now ready to test your code on the runner." - name: List files in the repository run: | ls ${{ github.workspace }} - run: echo "🍏 This job's status is ${{ job.status }}."In dieser Phase müssen Sie die Details dieses Workflows nicht verstehen. Jetzt können Sie den Inhalt einfach kopieren und in die Datei einfügen. Nach Abschließen dieses Schnellstartleitfadens findest du weitere Informationen zu Syntax von Workflowdateien unter Workflows sowie eine Erläuterung von GitHub Actions-Kontexten, wie z. B.
${{ github.actor }}und${{ github.event_name }}, unter Kontextreferenz. -
Klicke auf Änderungen übernehmen.
-
Wählen Sie im Dialog "Änderungen vorschlagen" entweder die Option, in die standardmäßige Verzweigung zu übertragen oder die Option, eine neue Verzweigung zu erstellen und eine Pull-Anfrage zu starten. Klicken Sie dann auf Änderungen übernehmen oder Änderungen vorschlagen.
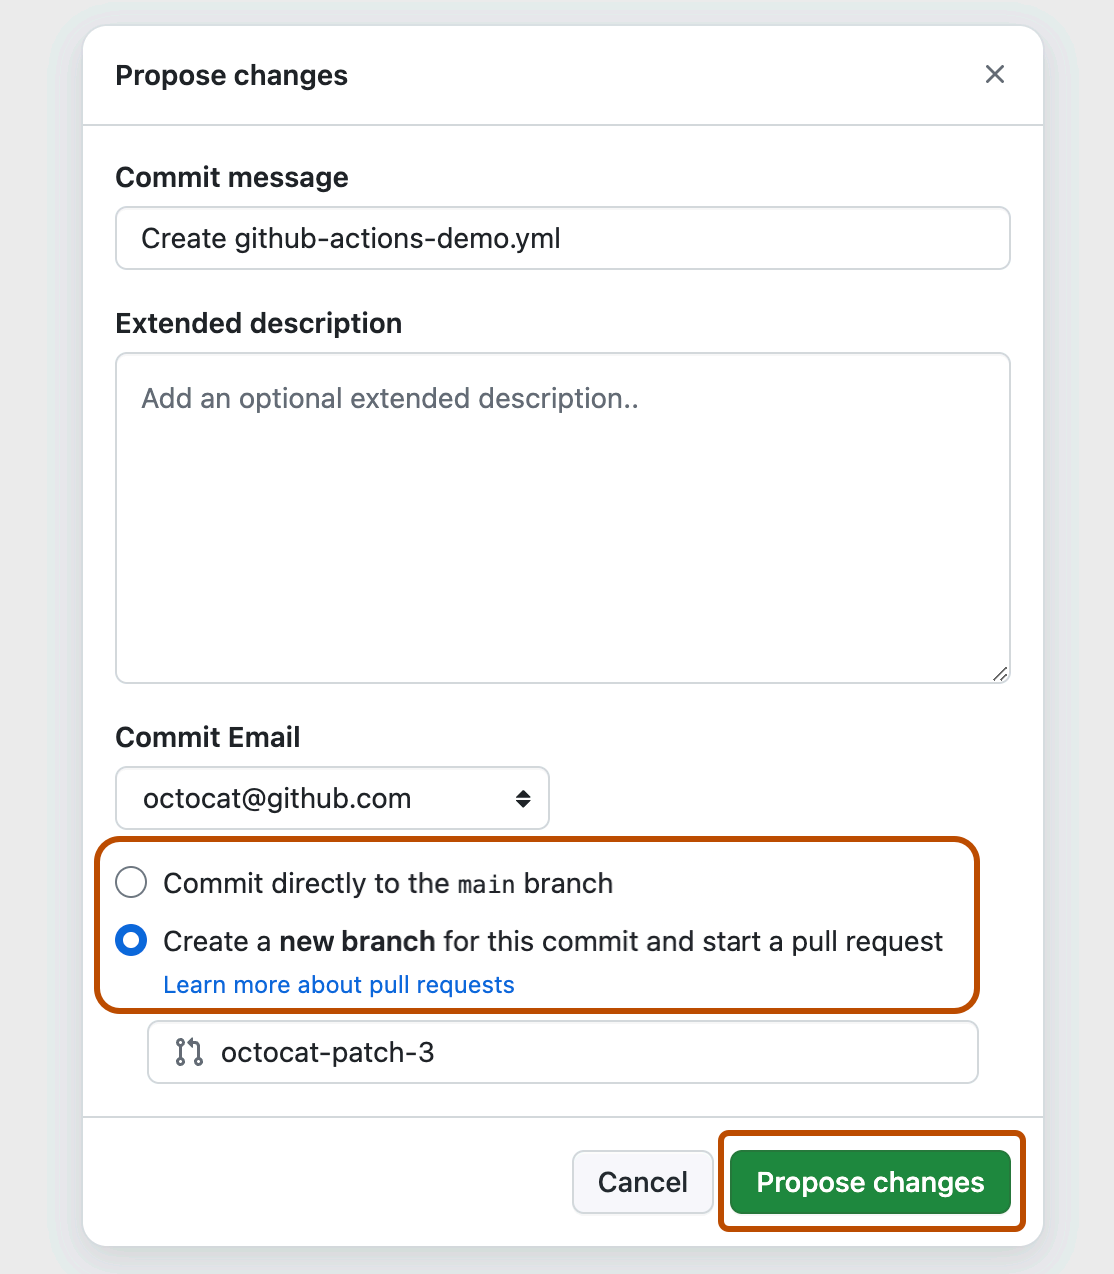

Durch das Festschreiben der Workflowdatei in einen Branch in deinem Repository wird das push-Ereignis ausgelöst, und dein Workflow wird ausgeführt.
Wenn Sie sich entschieden haben, einen Pull Request zu starten, können Sie den Pull Request fortsetzen und erstellen. Es ist jedoch für die Zwecke dieser Schnellstartanleitung nicht erforderlich, da der Commit noch an einer Verzweigung vorgenommen wurde und den neuen Workflow auslöst.
Anzeigen der Workflowergebnisse
-
Navigieren Sie auf GitHub zur Hauptseite des Repositorys.
-
Klicke unter dem Repositorynamen auf Actions.

-
Klicken Sie in der linken Randleiste auf den Workflow, den Sie anzeigen möchten, in diesem Beispiel "GitHub Actions Demo".
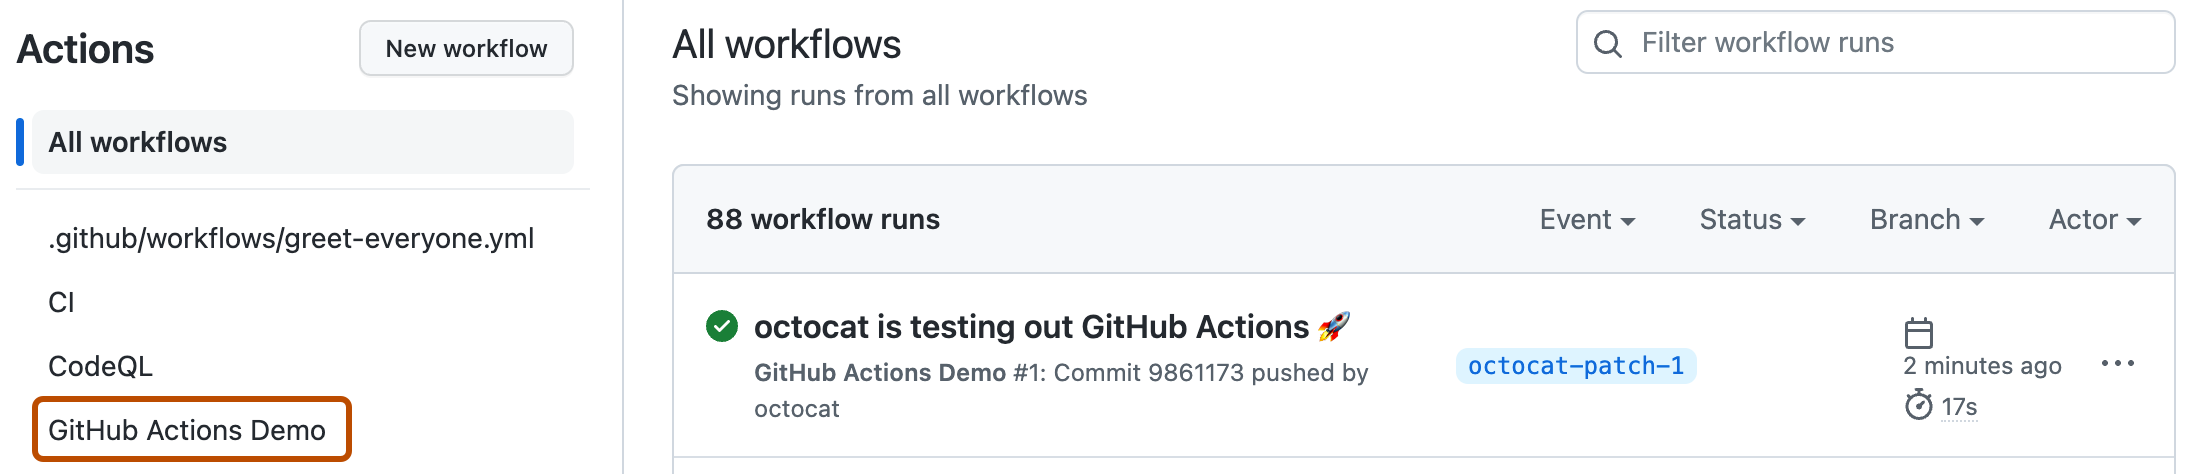
-
Klicken Sie in der Liste der Workflowausführungen auf den Namen der anzuzeigenden Ausführung, in diesem Beispiel "BENUTZERNAME testet GitHub Actions".
-
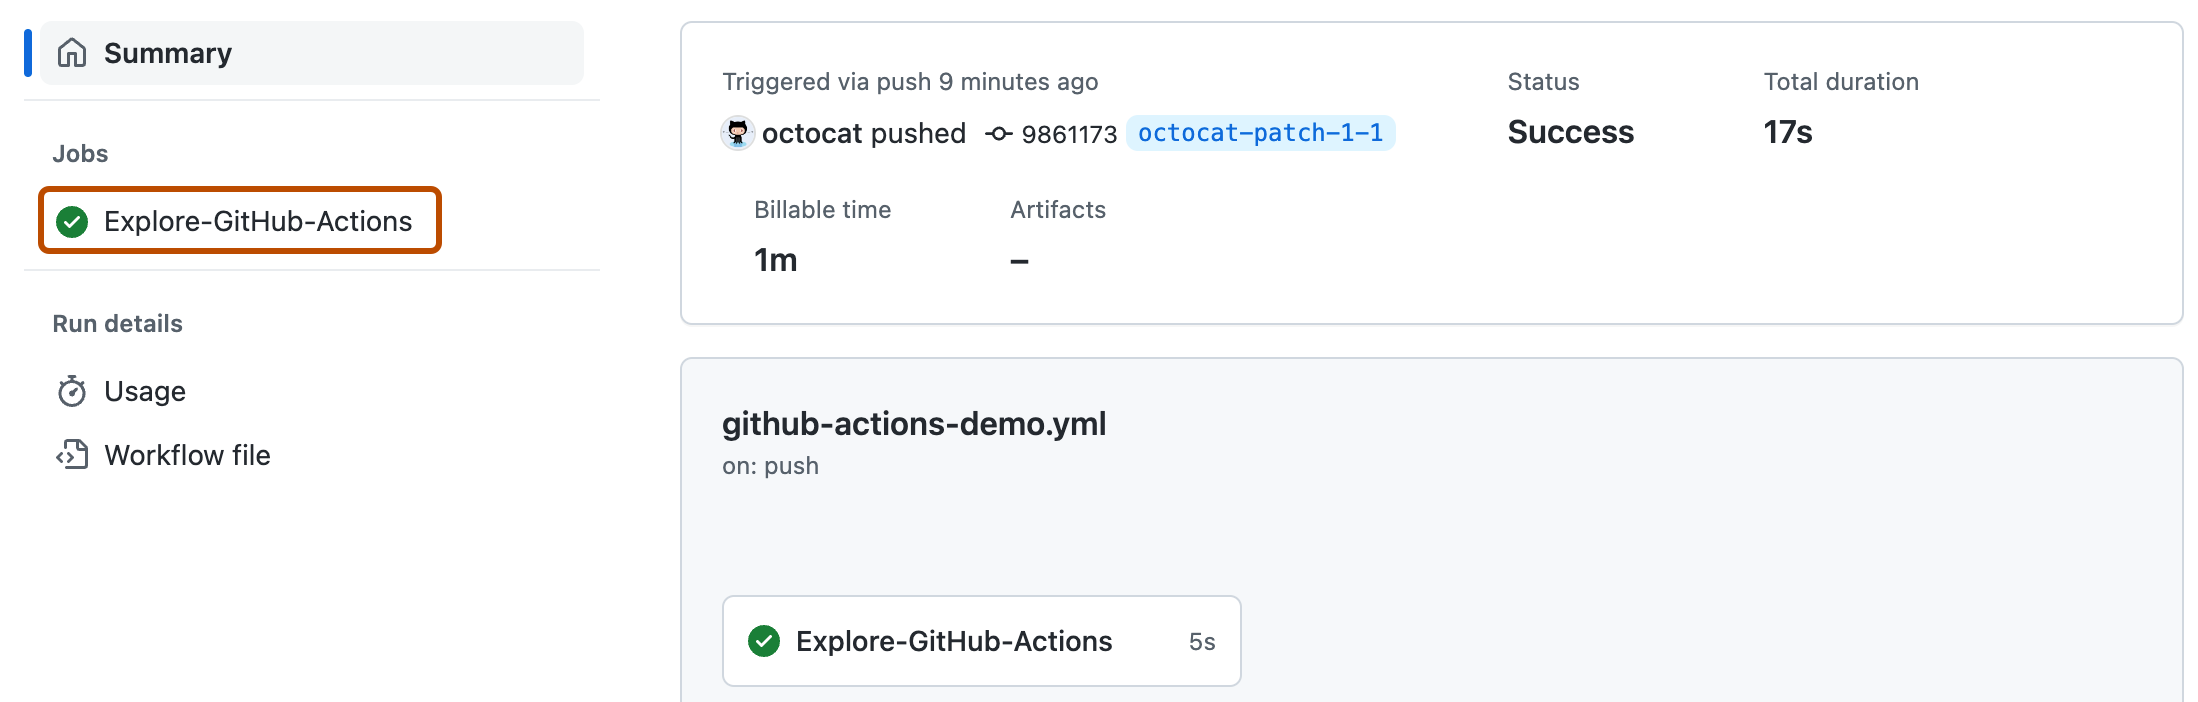
Klicken Sie auf der linken Randleiste der Workflowausführungsseite unter Jobs auf den Auftrag Explore-GitHub-Actions.
-
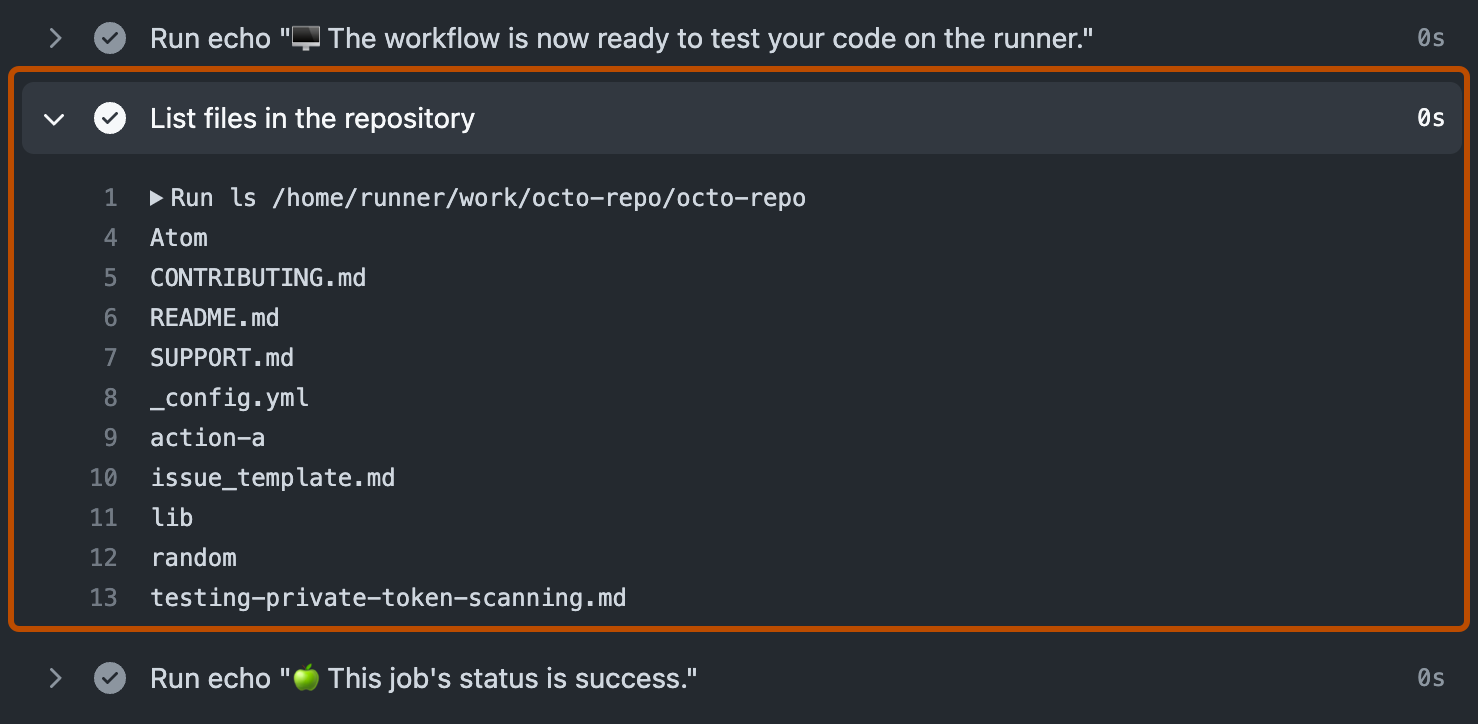
Das Protokoll zeigt, wie die einzelnen Schritte ausgeführt wurden. Erweitere einen beliebigen Schritt, um die zugehörigen Details anzuzeigen.
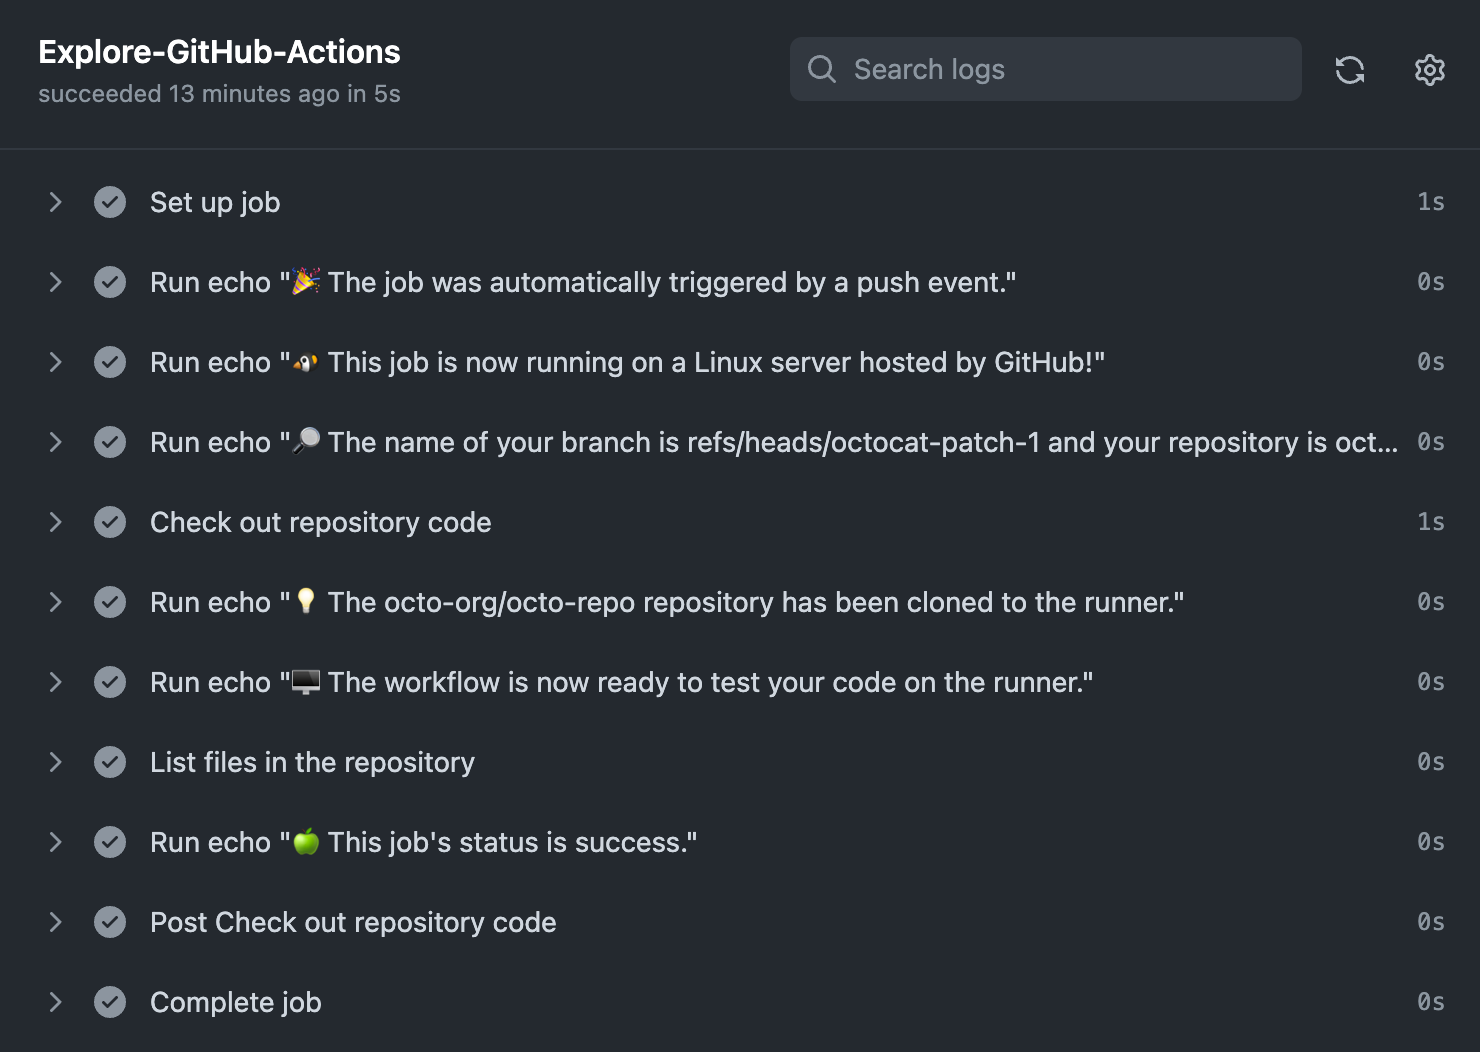
Beispielsweise wird die Liste der Dateien in deinem Repository angezeigt:


Der soeben hinzugefügte Beispielworkflow wird jedes Mal ausgelöst, wenn Code an den Branch gepusht wird, und er zeigt, wie GitHub Actions den Inhalt deines Repositorys verwenden kann. Ein ausführliches Tutorial findest du unter Grundlegendes zu GitHub Actions.
Nächste Schritte
GitHub Actions kann dir dabei helfen, nahezu alle Aspekte deines Anwendungsentwicklungsprozesses zu automatisieren. Willst du loslegen? Hier findest du einige hilfreiche Ressourcen für deine nächsten Schritte mit GitHub Actions:
- Informationen zum Erstellen eines GitHub Actions-Workflows sind unter Verwenden von Workflowvorlagen zu finden.
- Informationen zu CI-Workflows (Continuous Integration) sind unter Deinen Code bauen und testen zu finden.
- Informationen zum Erstellen und Veröffentlichen von Paketen findest du unter Pakete veröffentlichen.
- Informationen zum Bereitstellen von Projekten findest du unter Bereitstellen auf Drittanbieterplattformen.
- Informationen zum Automatisieren von Aufgaben und Prozessen auf GitHub findest du unter Verwalten deiner Arbeit mit GitHub Actions.
- Beispiele, die komplexere Features von GitHub Actions veranschaulichen, sind unter Verwalten deiner Arbeit mit GitHub Actions zu finden. Diese detaillierten Beispiele erläutern, wie man Code auf einem Runner testen, auf die GitHub-CLI zugreifen und erweiterte Funktionen wie Parallelität und Testmatrizen verwenden kann.
- Zum Nachweis der Kenntnisse in der Automatisierung von Arbeitsabläufen und der Beschleunigung der Entwicklung mit GitHub Actions kann ein GitHub Actions-Zertifikat mit GitHub Certifications erworben werden. Weitere Informationen findest du unter Informationen zu GitHub Certifications.