When a repository contains an ACCESSIBILITY.md file, GitHub displays an Accessibility tab on the repository overview and links to the page from the repository's About section.
GitHub looks for the file in the .github directory, the repository root, and the docs directory, in that order. If the repository does not contain an accessibility page, it can inherit one from a repository named .github that is owned by the organization.
An accessibility page can describe your project's accessibility priorities, supported environments, known barriers, contributor expectations, reporting process, ownership, and maintenance.
Adding an accessibility page from Community Standards
For a public repository, you can start with the accessibility page template.
-
On GitHub, navigate to the main page of the repository.
-
Under your repository name, click Insights.

-
In the left sidebar, click Community Standards.
-
Under "Additional community file," find "Accessibility," then click Add or Propose.
-
Replace the instructions in the template with accessibility-related information for your project. The instructions are stored in comments and do not appear when GitHub renders the file.
-
Click Commit changes...
-
In the "Commit message" field, type a short, meaningful commit message that describes the change you made to the file. You can attribute the commit to more than one author in the commit message. For more information, see Creating a commit with multiple authors or on behalf of an organization.
-
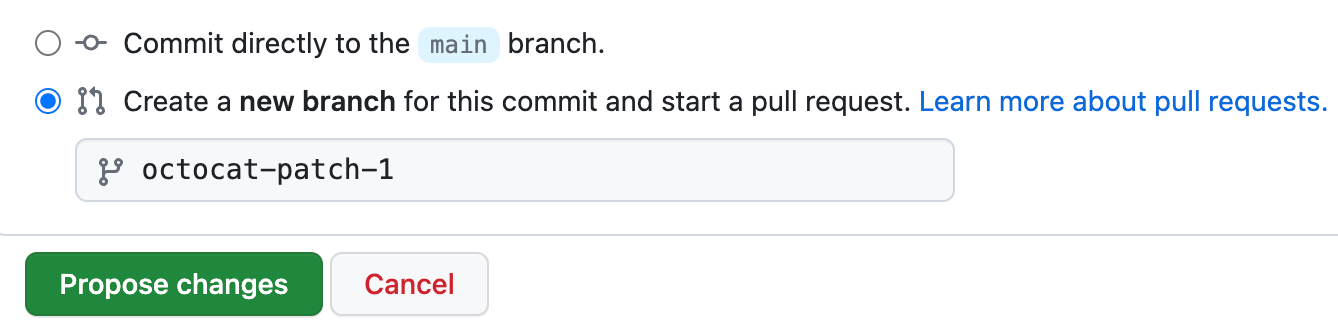
Below the commit message fields, decide whether to add your commit to the current branch or to a new branch. If your current branch is the default branch, you should choose to create a new branch for your commit and then create a pull request. For more information, see Creating a pull request.
-
Click Commit changes or Propose changes.


Creating an accessibility page manually
-
On GitHub, navigate to the main page of the repository.
-
Above the list of files, select the Add file dropdown menu, then click Create new file.
Alternatively, you can click in the file tree view on the left.

-
In the file name field, type ACCESSIBILITY.md. To store the file in the
.githubordocsdirectory, type .github/ACCESSIBILITY.md or docs/ACCESSIBILITY.md. -
On the Edit new file tab, add accessibility-related information.
-
Click Commit changes...
-
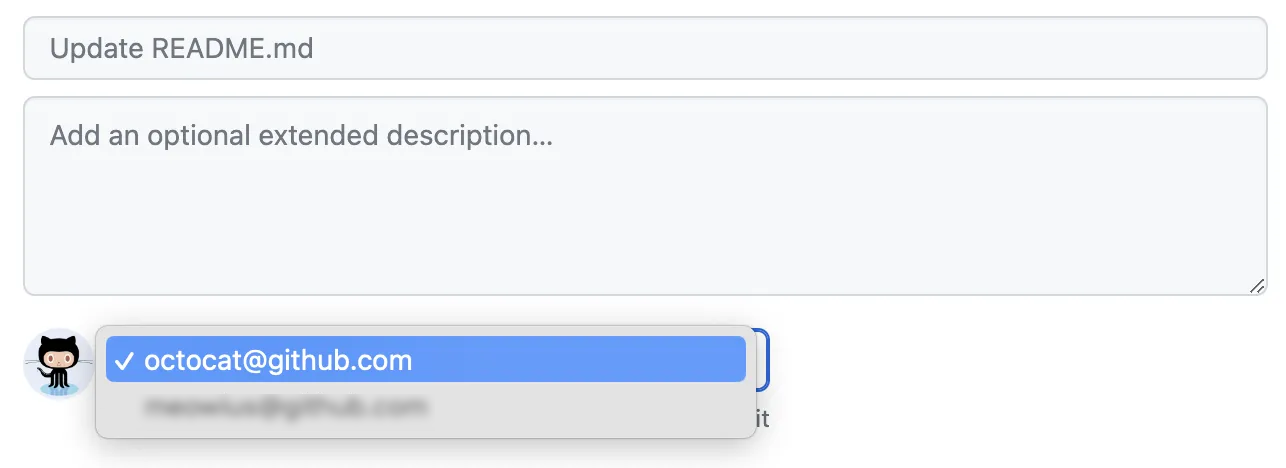
In the "Commit message" field, type a short, meaningful commit message that describes the change you made to the file. You can attribute the commit to more than one author in the commit message. For more information, see Creating a commit with multiple authors or on behalf of an organization.
-
If you have more than one email address associated with your account on GitHub, click the email address drop-down menu and select the email address to use as the Git author email address. Only verified email addresses appear in this drop-down menu. If you enabled email address privacy, then a no-reply will be the default commit author email address. For more information about the exact form the no-reply email address can take, see Setting your commit email address.
-
Below the commit message fields, decide whether to add your commit to the current branch or to a new branch. If your current branch is the default branch, you should choose to create a new branch for your commit and then create a pull request. For more information, see Creating a pull request.
-
Click Commit changes or Propose changes.

